Exploring the Art of Double Exposure Photography
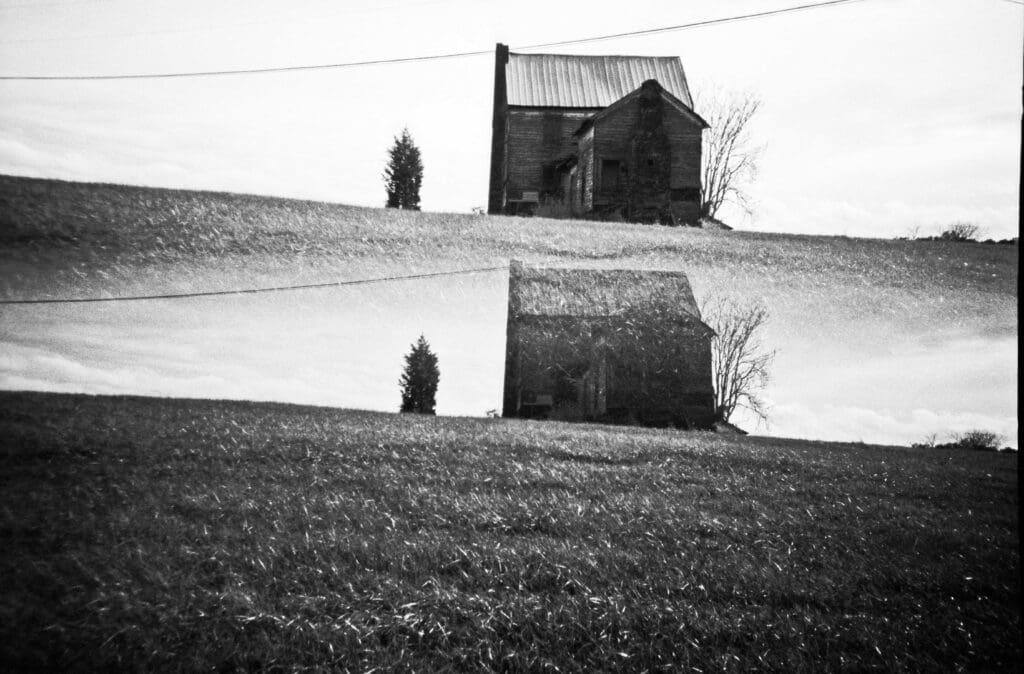
Many people might not realize how much I love creating double exposures, a technique I’ve rarely brought into my humanitarian photography—though that might change! I’m thrilled to share my passion for this creative process with you all. Throughout my journey, I’ve explored this art form both solo and in collaboration with other photographers. In one memorable project, I exposed only one side of a film roll, then rewound it to capture overlapping images on the other side. On another occasion, I swapped rolls with a fellow photographer, combining our different textures and subjects. These collaborations not only enriched the creative process but also deepened our collective understanding and love for this unique photographic technique.
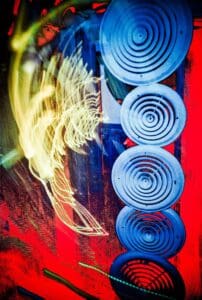
Additionally, I often use long exposures to create captivating light trails, blending the motion of light with static elements to produce striking visual effects that add another layer of depth to my projects.

Comprehensive Guide to Double Exposures:
1. Choose Your Camera:
- Film Cameras: Load the film, take the first shot, then without advancing the film, prepare for the next. This overlay creates the double exposure.
- Digital Cameras: Use the multiple exposure mode available in many modern cameras, including models from Nikon and Canon.
- Instant Cameras: Devices like the Lomo’Instant facilitate easy multiple exposures.
2. Plan Your Shots Creatively:
- Contrast and Themes: Use contrasting elements such as urban versus natural scenes, or themes that tell a story through your images. You can find contrasts everywhere.
- Textures and Colors: Overlay textures onto subjects or use colored gels for flash lighting to add depth and vibrancy.
- Cross Processing: Experiment with cross-processing your film to achieve unique colors and tones.

3. Experiment with Techniques:
- Utilize various effects like the Ghost Effect for ethereal images, or manipulate your environment using tools like a Splitzer for unique visual splits.
- Number of Exposures: Don’t limit yourself to two exposures; explore with two, twenty, or more to see what develops.
4. Control Lighting:
- Adjust your lighting to fit the mood of your exposures, ensuring they aren’t too bright which could overpower your images.
5. Composition:
- Be mindful of negative space and place subjects strategically. A central subject can serve as a focal point, while off-center elements can lend dynamism to your composition.
Double exposure photography is an invitation to look beyond the obvious, to blend and create, to experiment and discover. Each frame holds infinite possibilities, waiting to be unveiled. And remember, don’t be scared to break the rules, if you do, I think you will be pleasantly surprised!
#PhotographyTips #DoubleExposure #CreativePhotography #FilmPhotography #DigitalPhotography